The back squat is the best lift to use to evaluate overall lower body strength.
Often called “the king of all exercises,” the back squat uses all of the major muscle groups of the lower and upper body to act as either prime movers or stabilizers. Although there are other lower body-dominant lifts that are more indicative of athletic ability (power snatch and front squat, for example), the back squat is the classic lift for strength in the lower body extensors.
A complete knowledge of back squat technique is necessary for strength coaches and trainers because it yields several clues to weaknesses, imbalances, and inflexibilities of the lower and upper body. This article provides a start-to-finish guide for improving your own squat, with an eye to the finer details of how to coach it.
Tip #1 Before Squatting: Achieve a Basic Level of Strength and Balance
Achieve a basic level of strength and structural balance before beginning to back squat with a barbell. It’s necessary to have basic flexibility in the hip and ankle joints, and to not have any dramatic muscular imbalances. For example, a weak vastus medialis obliquus or VMO will make any back squat training ineffective and put you at risk of injury. Equally, weak spinal erectors or improper back posture (rounding of the back during the lift) can be disastrous.
Be sure to fully train the entire posterior chain, including the hamstrings, glutes, and spinal erectors. The squat is an exercise that you must earn the right to do by displaying excellent structural integrity. Achieve this before adding back squats to your program by performing split squats in all variations, as well as step-ups at varying heights and styles.
Tip #2 Use A Power Rack for Safety
The barbell back squat is best performed inside a power rack for maximum safety. Using a power rack allows you to lift to failure with far less chance for injury.
Tip #3 Set Up the Power Rack
To prepare the power rack for the squat, set the uprights at a height slightly below the height of your shoulders. Place the bar on the uprights, and ensure that you can easily un-rack and re-rack the barbell on your trapezius muscles without difficulty. Next, place the pins at a height slightly below your maximum squat depth, so that in the bottom position, your barbell hovers just above them.
If you fail during any rep, you will be able to set the bar on the pins without getting driven into the floor.
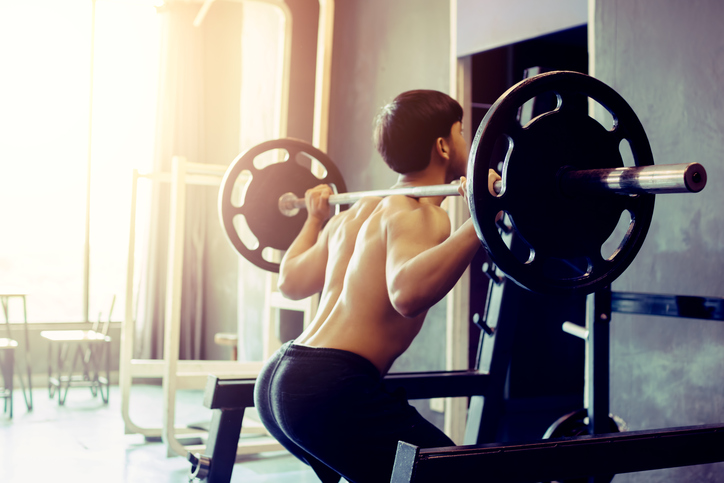
Tip #4 Use Proper Hand and Elbow Placement: Keep Elbows Below Bar
Put your hands evenly on the bar before getting underneath it to ensure that you are in the center of the bar. Typically, a grip slightly wider than shoulder width is most comfortable. Once you have established an even grip on the bar, step underneath it and position it on the musculature of the upper trapezius. Bring your elbows below the bar and keep them in that position throughout the lift. Stand up and lift the bar off the pins.
Step backwards from the pins to the middle of the power rack so there is no chance you will hit them or the uprights during the squat motion. Place the feet approximately shoulder width apart, with the toes pointing slightly outward at approximately 5º. Raise the chest to an upright position and look straight ahead. Remember to bring the elbows directly under the bar and keep them there.
Tip #5 Begin Bending at the Knee and Use A Full-Range of Motion
Begin the movement by bending at the knees, which should track in a line close to the border of the first and the second toe. You want to achieve a full-range of motion, which puts emphasis on maximum knee flexion, resulting in the knees traveling past the toes. This technique is perfectly safe for the healthy knee. If you have concerns as to whether you have the structural balance for this lift, consider hiring a qualified coach in your area to evaluate you.
Tip #6 Avoid Excessive Forward Lean: A Modification
During the descent, inhale in a controlled manner. As you go down during the eccentric phase of the squat, you will be forced to flex at the hips slightly, to reach maximum depth. If you lack flexibility in the ankles or hips, it will result in excessive hip flexion with the upper body coming forward. This compromises the technique and needs to be avoided. Ideally, you can get soft tissue work and perform a stretching program to improve joint flexibility.
A modification to work around lack of flexibility is to place a slanted wedge or weight plates under the heels. This should allow you to achieve full-range of motion without leaning forward excessively.
Tip #7 Achieve Maximum Depth with Hamstrings Covering Calves
Maximum depth for the squat occurs when the hamstrings fully cover the calves. The degree of hip flexion necessary to reach proper depth is very individual, and is based on the flexibility of the entire lower body, but as mentioned in #6, the less hip flexion necessary, the better.
For every 5º forward that you are forced to bend, you increase the sheer force at the area of L4-L5 lumbar vertebrae by an average of 50 lbs. This figure obviously increases exponentially as your ability to move more weight improves. Although there are useful derivations of the squat that train the spinal erectors more intensely, the goal of the basic squat is to maintain an ideal, neutral, posture.
Tip #8 Maintain Form During the Upward Phase: Just Stand Up!
At the bottom of the lift, begin a controlled exhalation. The upward concentric phase is essentially a simple motion in which you stand up, so that you end up where you started. The ability to stand up fluidly with the right movement pattern is a function of overall structural balance. To achieve this, focus on these key points:
1) Drive with the legs and squeeze the glutes during the concentric phase (imagine holding a coin between the cheeks of your buttocks to get the right idea).
2) Keep your chest held high and look straight ahead. Do not look upward at the ceiling or excessively bull the neck because doing so interferes with neural drive.
3) Keep the elbows directly under the bar. Many trainees new to squatting allow their elbows to drift backwards. Doing so makes it more difficult to keep the chest and head in proper alignment, which leads to undue stress on the spinal erectors.
4) Push upwards slightly on the bar with the hands. Although pressing upward does not actually lift the barbell, it allows you to engage the spinal erectors to a greater degree, which helps you to maintain an upright posture and a neutral spine.
5) Avoid performing a back extension during the upward concentric phase of the squat. Extending the back is an indication of technical failure and means structural imbalances or lack of flexibility are hindering your ability to correctly perform a back squat. Remember, the prime movers of this exercise are the quadriceps, not the spinal erectors, meaning the back should be stabilized.
Tip #9 Warnings: Avoid Putting Weight on the Toes or the Knees Collapsing
At all times during this lift, the heels should remain planted firmly. Ideally, they should be on the floor, but as mentioned above, a modification for inflexible ankles or poor movement patterns is to elevate the heels, but they still must stay firmly planted. Avoid coming onto the ball of the feet during the descent or putting the weight on the toes.
There should be no bowing or collapsing of the knees during the movement. Keep the spinal erectors stabilized and avoid excessive extension or flexion of the spine.
End the set when you cannot maintain good posture during the movement. Unfortunately, it is common for trainees and coaches to turn this exercise into a complete circus act. The trainee may begin with correct technical form, but because of too much weight, lack of structural balance, or not understanding the movement pattern, the back squat degrades to resemble other exercises and is utterly ineffective as a lower body strength exercise. If you do not insist on strict form, you put yourself or your trainee at risk of injury in this exercise.
Tip #10 Strive for PICP Squat Standards
The PICP standards for the squat are very rigorous. For novices and individuals who don’t follow an organized program that includes structural balance, the back squat is one of the hardest lifts to perform effectively.
Your Back Squat should be 160 percent of your performance in the bench press. That means that if you can close grip bench press 200 lbs, you should be able to squat 320 lbs.
Lack of flexibility and poor movement patterns often get in the way of proper squat technique and will inhibit you from achieving impressive gains. Make it a goal to reach PICP squat standards and use the modifications when necessary, but don’t ignore the need to improve flexibility with soft tissue therapy and stretching. Anyone can achieve structural balance if they perform the right exercises, so don’t be deterred from making gains and adding the barbell back squat to your program.
References:
Balshaw, T., Hunter, A. Evaluation of Electromyography Normalization Methods for the Back Squat. Journal of Electromyographic Kinesiology. December 2011. Published Ahead of Print.
Crewther, B., Kilduff, L., et al. The Acute Potentiating Effects of Back Squat on Athlete Performance. Journal of Strength and Conditioning Research. November 2011. Published Ahead of Print.
Gullett, J., Tillman, M., Gutierrez, G., Chow, J. A Biomechanical Comparison of Back and Front Squats in Healthy Trained Individuals. Journal of Strength and Conditioning Research. 2009. 23(1), 284-292.
Parchmann, C., McBride, J. Relationship Between Functional Movement Screen and Athletic Performance. Journal of Strength and Conditioning Research. December 2011. 25(12), 3378-3384.